Perfect Backyard Vegetable Garden Plan: Feed Your Family Fresh!

Last year my vegetable garden was a 6" high raised bed that was 5' x 15'. It worked for a while, but the soil wasn't very deep since the bed wasn't as raised as much as I would have liked, and a nearby tree had grown so quickly that it blocked the afternoon sun to half of the garden which simply won't work for growing a harvest of summer vegetables. So last year I began designing my dream garden on paper, not really sure if it would ever become a reality. We dreamed big, but wanted to keep it as budget friendly as possible.
I used growveg to make my original garden design. I am absolutely in love with this software! It has made my gardening SO MUCH EASIER! As much as I like researching and charting, this makes the planning a dream! (try the 30 day free trial, and you'll know what I mean!)

This was the plan for the spring 2014 layout. 28' x 20' with five raised beds in the center and a raised bed bordering the entire garden with 2ft. wide walkways except by the gate (3ft. to accommodate a garden cart for hauling mulch, etc.) for a total of 380 sq. ft. of gardening space.
To be ready for planting in the spring of 2014, we started working on the project during the late summer of 2013.
As always with gardening, the beginning is the most difficult part- so much work with not much to show for it. The first step was marking off the area and digging up the grass. We rented a sod cutter from Home Depot for $65. Worth. Every. Penny. It was still a lot of work, but nothing compared to doing an area of that size by hand.

Next we laid a thick layer of cardboard over the entire area. This is an inexpensive way to keep down weeds and keep the grass from growing back.

We framed up our five center raised beds using lumber we had gathered over time from the 90% off section at Home Depot. For the center beds we used cedar fence boards and for the outer edge beds we used a combination of landscape timbers and 2x4's. We ended up spending only about $30 for all of the wood needed.

Once the raised beds were framed up, we placed them in the layout and spaced them to accommodate walking space between each.

The chickens are very curious about what we are doing!
Next we started filling the raised beds with compost and mulch. We wanted to avoid buying any dirt if at all possible, but it is difficult to fill over 500 cubic feet of area with your own backyard compost. We had been building up our compost pile for almost a year in anticipation and were able to fill the five center beds at once.

You can see what used to be my vegetable garden in the foreground, and the new garden in the back.
Next we build a fence around the garden area to keep out the chickens. Very important! Chickens will eat up a vegetable garden as fast as it can grow! We used the pre-assembled picket fence panel from Lowe's. They cost $30 for an 8ft. piece. Instead of using concrete for the posts, we used the packed earth method around 4x4's and were really pleased with the stability of the outcome. We could have saved more money by going with a more rustic fence made of palettes, but I just like the look of a picket fence! We only needed 6 fence panels since we already had a hurricane fence on one side and the house on another. The fence, gate and hardware ended up costing about $200.


A family member had been getting rid of hundreds of these cement cylinders for free, so we laid them along the inside of the fence base to keep the dirt in and the grass and weeds out of the edge gardens.We were glad to get these for free!
Next we framed up the edge gardens and screwed them together to form the border beds. We hadn't built up enough compost since the last batch to fill these up. The Lafayette Utilities System offers free truckloads of mulch for gardening so we picked up a truckload of that to fill the edge gardens. While it is mulch that hasn't broken down completely yet, we were able to cover it with compost with some time to spare to help it break down into rich soil before we planted.

I put up chicken wire around the inside of the picket fence all the way around to keep out any critters that would want to squeeze between the fence boards. (chickens, *cough*) A 50' roll of chicken wire cost $25.

Originally I had used another truckload of mulch for the pathways, and was content to pull a few weeds growing between the gardens.

That is, until I ran across a great find at a yard sale. A whole stack of bricks for $60! We spent the next three weekends laying bricks and now have brick pathways between the raised beds. If I had known that there would be bricks, I would have bricked first and built the gardens in after to make all of the dimensions fit together just right, but the few gaps we have give it character :)

Finally, the fun part! We put in all of our plants and began the work of growing, harvesting, and cooking! To go from a drawing on paper to the final product was amazing! We are so excited about how our new garden turned out. Soon I will be posting how we did on our harvest.


Here is the final breakdown of how much we spent:
Sod cutter rental: $65
Wood for raised beds: $30
Fence panels, posts, and gate hardware: $200
Chicken wire: $30
Bricks for pathway: $60
Final Cost: $385
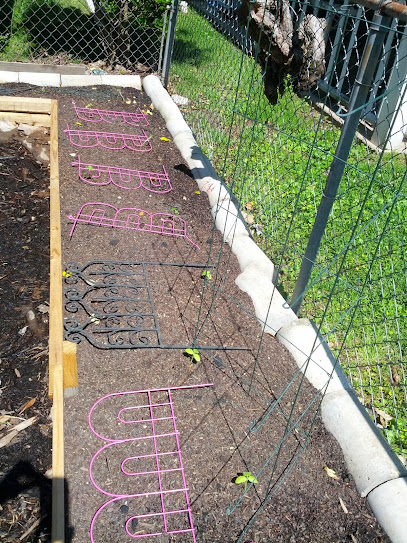
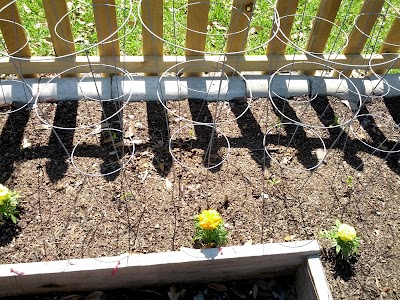
A few more pictures of the finished result. It is hard to get a good picture of the whole garden in one...


Do you have a vegetable garden that you love???
Comments
Post a Comment